Overview
Teaching: 5 min
Exercises: 10 minQuestions
How can I give my CI job private information?
Objectives
Add custom environment variables
Learn how to give your CI/CD Runners access to private information
So we’re nearly done with getting the merge request for the CI/CD up and running but we need to deal with this error:
$ AnalysisPayload root://eosuser.cern.ch//eos/user/g/gstark/public/DAOD_EXOT27.17882744._000026.pool.root.1 1000
xAOD::Init                INFO    Environment initialised for data access
TNetXNGFile::Open         ERROR   [ERROR] Server responded with an error: [3010] Unable to give access - user access restricted - unauthorized identity used ; Permission denied

Warning in <xAOD::TReturnCode>:
Warning in <xAOD::TReturnCode>: Unchecked return codes encountered during the job
Warning in <xAOD::TReturnCode>: Number of unchecked successes: 1
Warning in <xAOD::TReturnCode>: To fail on an unchecked code, call xAOD::TReturnCode::enableFailure() at the job's start
Warning in <xAOD::TReturnCode>:
ERROR: Job failed: exit code 1
Access Control
So we need to give our CI/CD access to our data. This is actually a good thing. It means CMS can’t just grab it! Anyhow, this is done by pretty much done by executing printf "$SERVICE_PASS" | base64 -d | kinit $CERN_USER@CERN.CH assuming that we’ve set the corresponding environment variables by safely encoding them (printf "hunter42" | base64).
Running examples with variables
Sometimes you’ll run into a code example here that you might want to run locally but relies on variables you might not have set? Sure, simply do the following
SERVICE_PASS=hunter42 CERN_USER=GoodWill printf "$SERVICE_PASS" | base64 -d | kinit $CERN_USER@CERN.CH
Base-64 encoding?
Sometimes you have a string that contains certain characters that would be interpreted incorreectly by GitLab’s CI system. In order to protect against that, you can safely base-64 encode the string, store it, and then decode it as part of the CI job. This is entirely safe and recommended.
Service Account or Not?
When you’re dealing with a personal repository (project) that nobody else has administrative access to, e.g. the settings, then it’s ok to use your CERN account/password in the environment variables for the settings…
However, when you’re sharing or part of a group, it is much better to use a group’s service account or a user’s (maybe yours) service account for authentication instead. For today’s lesson however, we’ll be using your account and show pictures of how to set these environment variables.
How to make a service account?
Go to CERN Account Management -> Create New Account and click on the
Servicebutton, then clickNextand follow the steps.
Variables
There are two kinds of environment variables:
- predefined
- custom
Additionally, you can specify that the variable is a file type which is useful for passing in private keys to the CI/CD Runners. Variables can be added globally or per-job using the variables parameter.
Predefined Variables
There are quite a lot of predefined variables. We won’t cover these in depth but link for reference as they’re well-documented in the GitLab docs.
Custom Variables
Let’s go ahead and add some custom variables to fix up our access control.
- Navigate to the
Settings -> CI/CDof your repository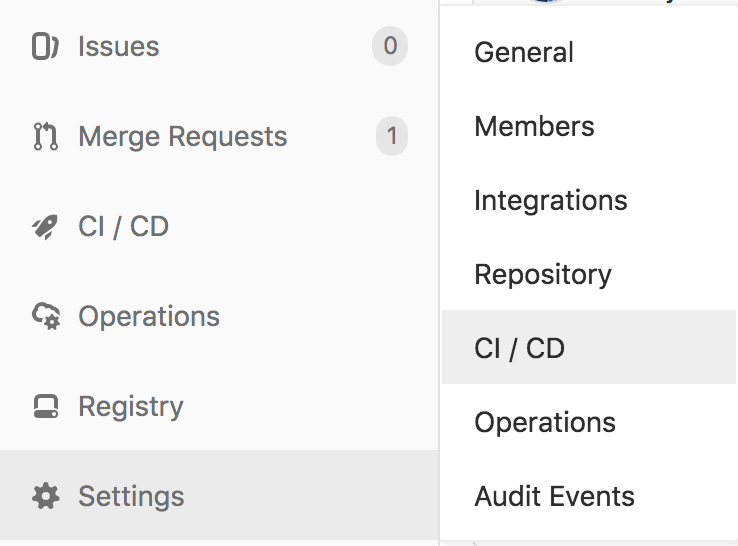
- Expand the
Variablessection on this page by clickingExpand
- Specify two environment variables,
SERVICE_PASSandCERN_USER, and fill them in appropriately. (If possible, mask the password).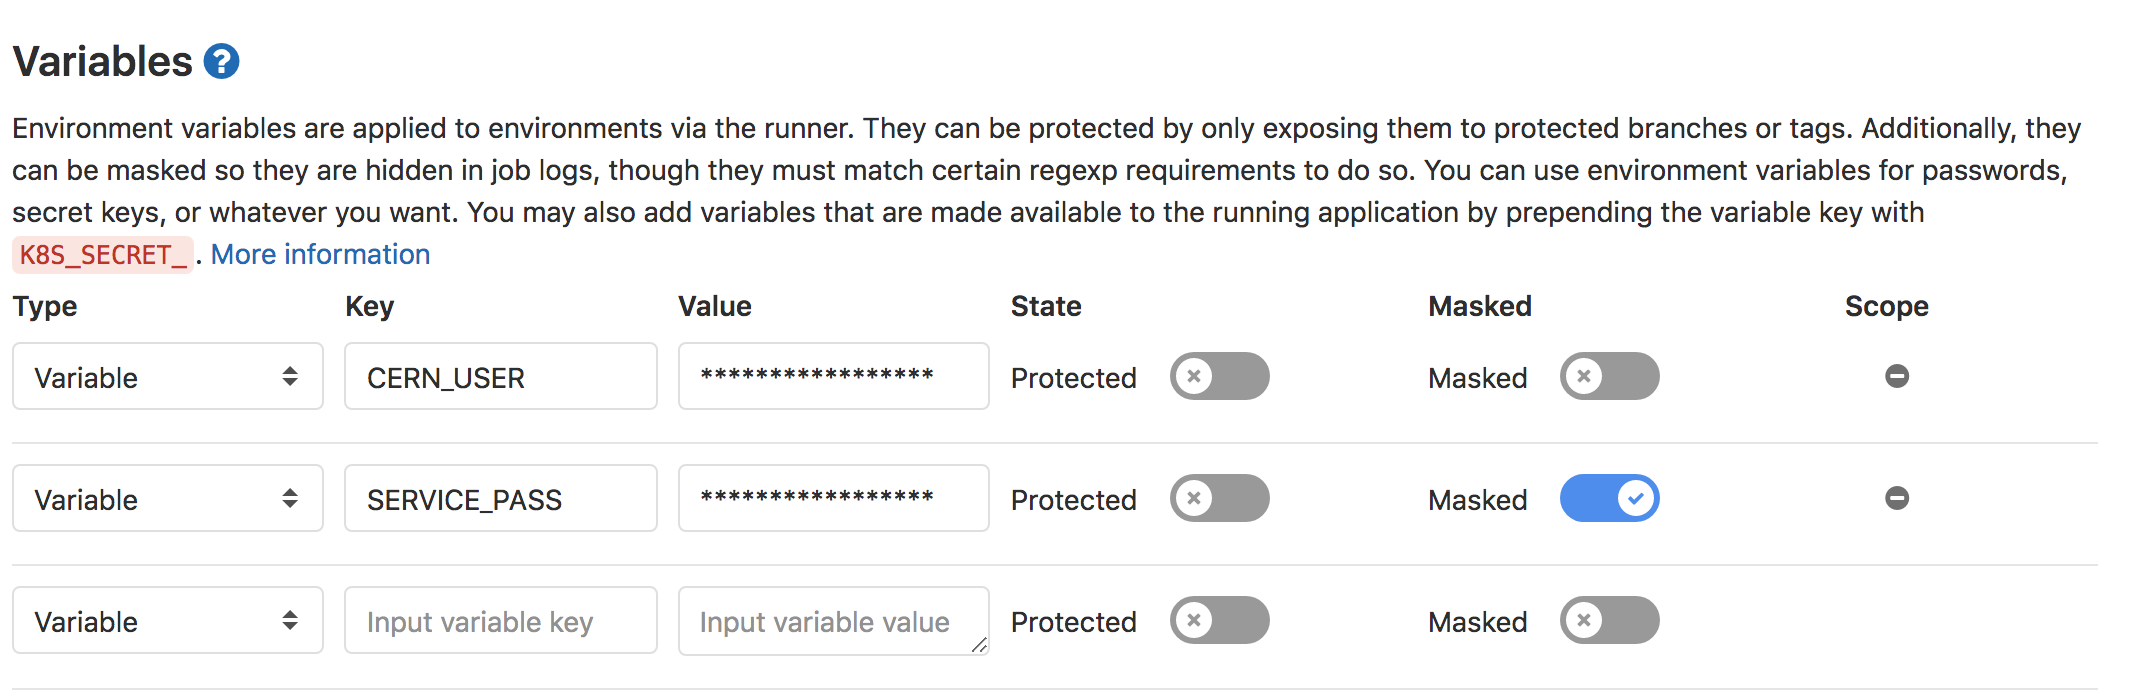
- Click to save the variables.
Adding kinit for access control
Now it’s time to update your CI/CD to use the environment variables you defined by adding printf "$SERVICE_PASS" | base64 -d | kinit $CERN_USER@CERN.CH as part of the before_script to the skim_ggH job as that’s the job that requires access.
Adding Artifacts on Success
As it seems like we have a complete CI/CD that does physics - we should see what came out. We just need to add artifacts for the run_exotics job. This is left as an exercise to you.
Adding Artifacts
Let’s add
artifactsto ourrun_exoticsjob to save therundirectory. Let’s have the artifacts expire in a week instead.Solution
run_exotics:
  stage: run
  image: atlas/analysisbase:21.2.125
  dependencies:
    - build
  before_script:
    - source /release_setup.sh
    - source build/${AnalysisBase_PLATFORM}/setup.sh
    - printf "$SERVICE_PASS" | base64 -d | kinit $CERN_USER@CERN.CH
  script:
    - mkdir run
    - cd run
    - AnalysisPayload root://eosuser.cern.ch//eos/user/g/gstark/public/DAOD_EXOT27.17882744._000026.pool.root.1 1000
  artifacts:
    paths:
      - run
    expire_in: 1 week
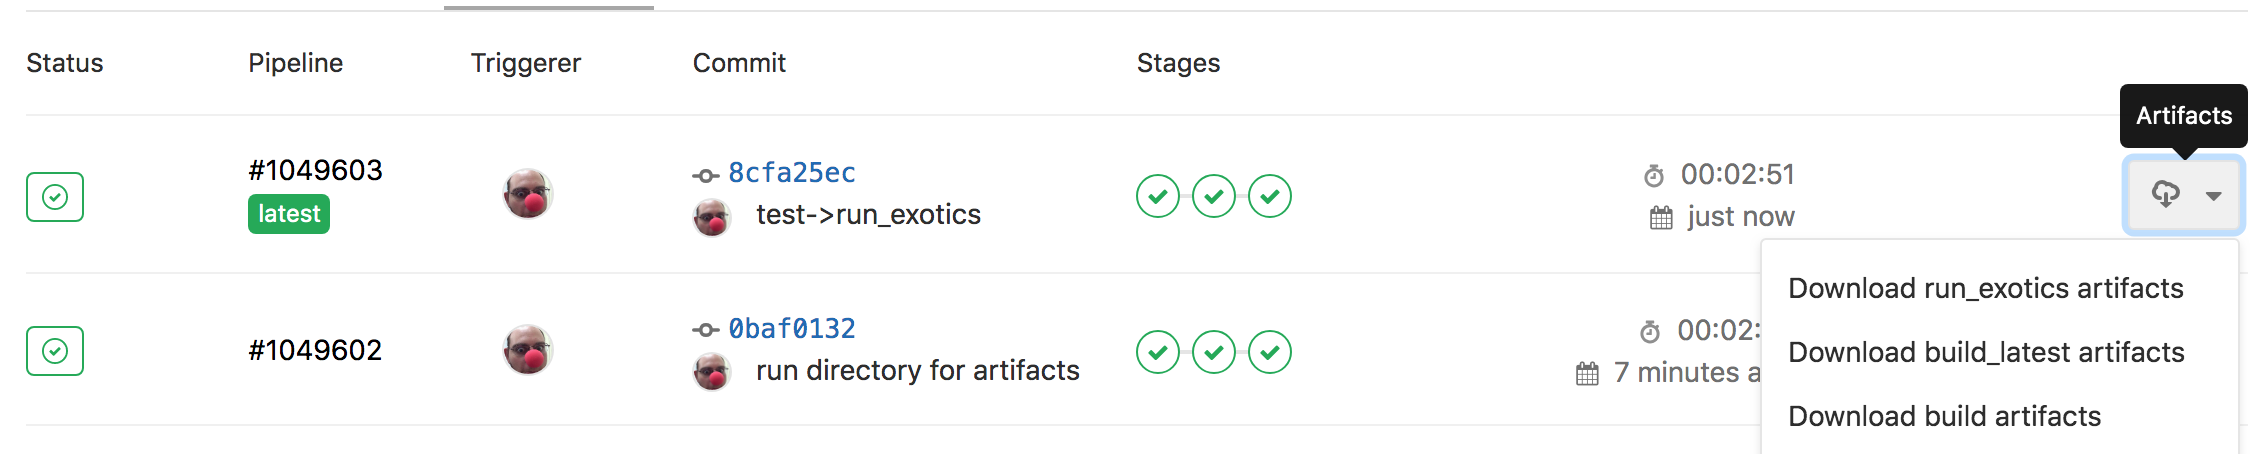
And this allows us to download artifacts from the successfully run job
or if you click through to a run_exotics job, you can browse the artifacts
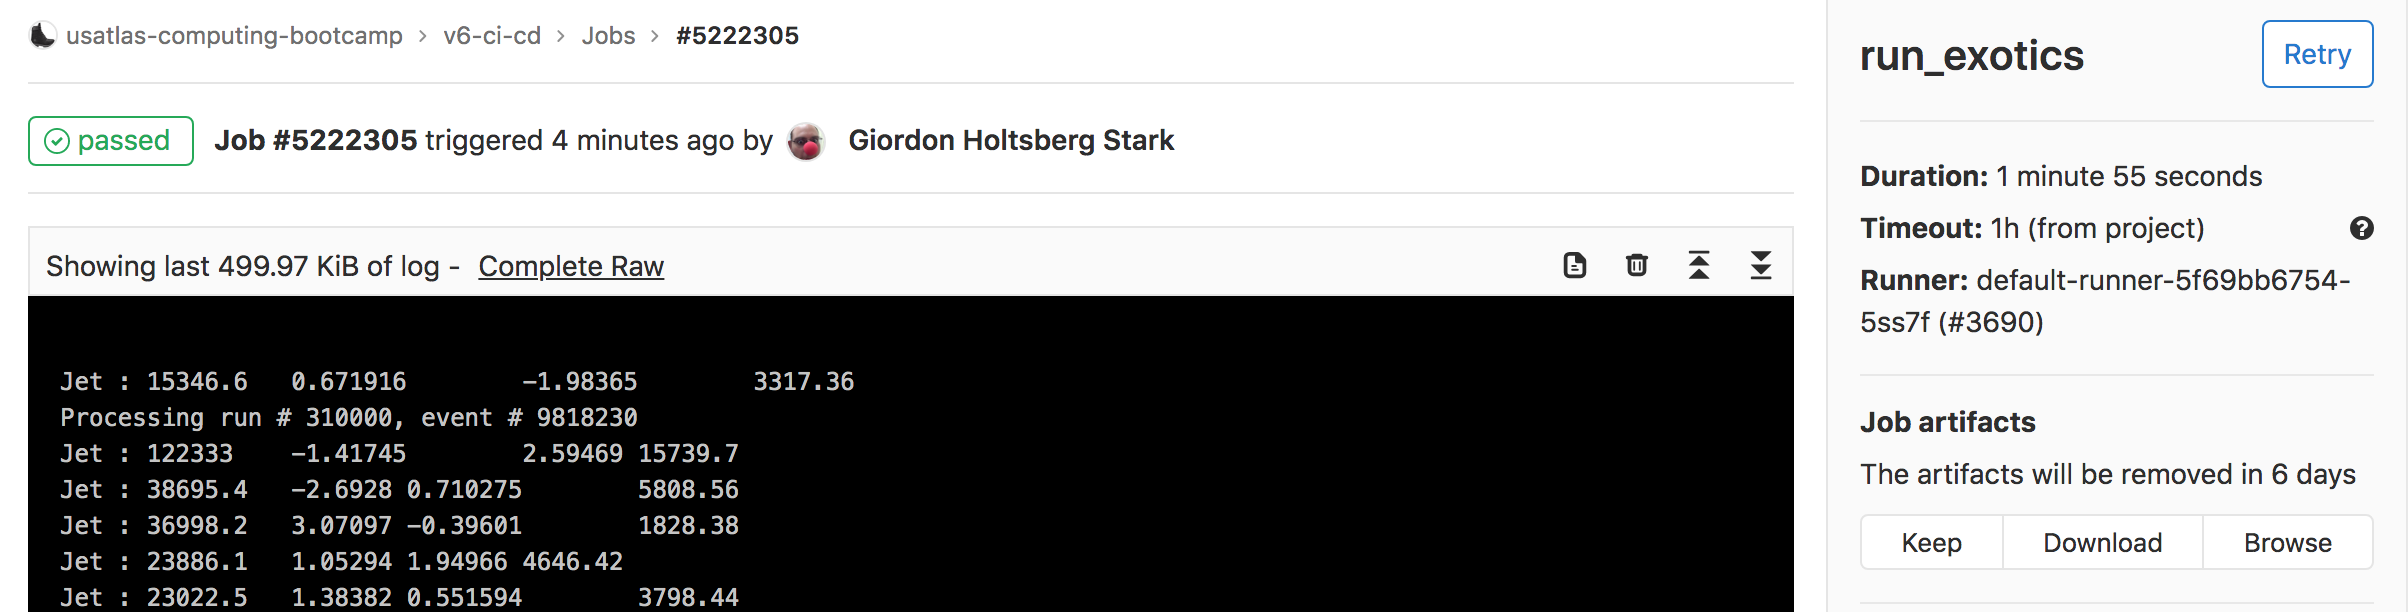
which should just be the run directory with the myOutputFile.root inside of it.
Further Reading
Key Points
Service accounts provide an extra layer of security between the outside world and your account
Environment variables in GitLab CI/CD allow you to hide protected information from others who can see your code